
How To Prepare Your Child’s Throwing Arm For The Upcoming Baseball Or Softball Season
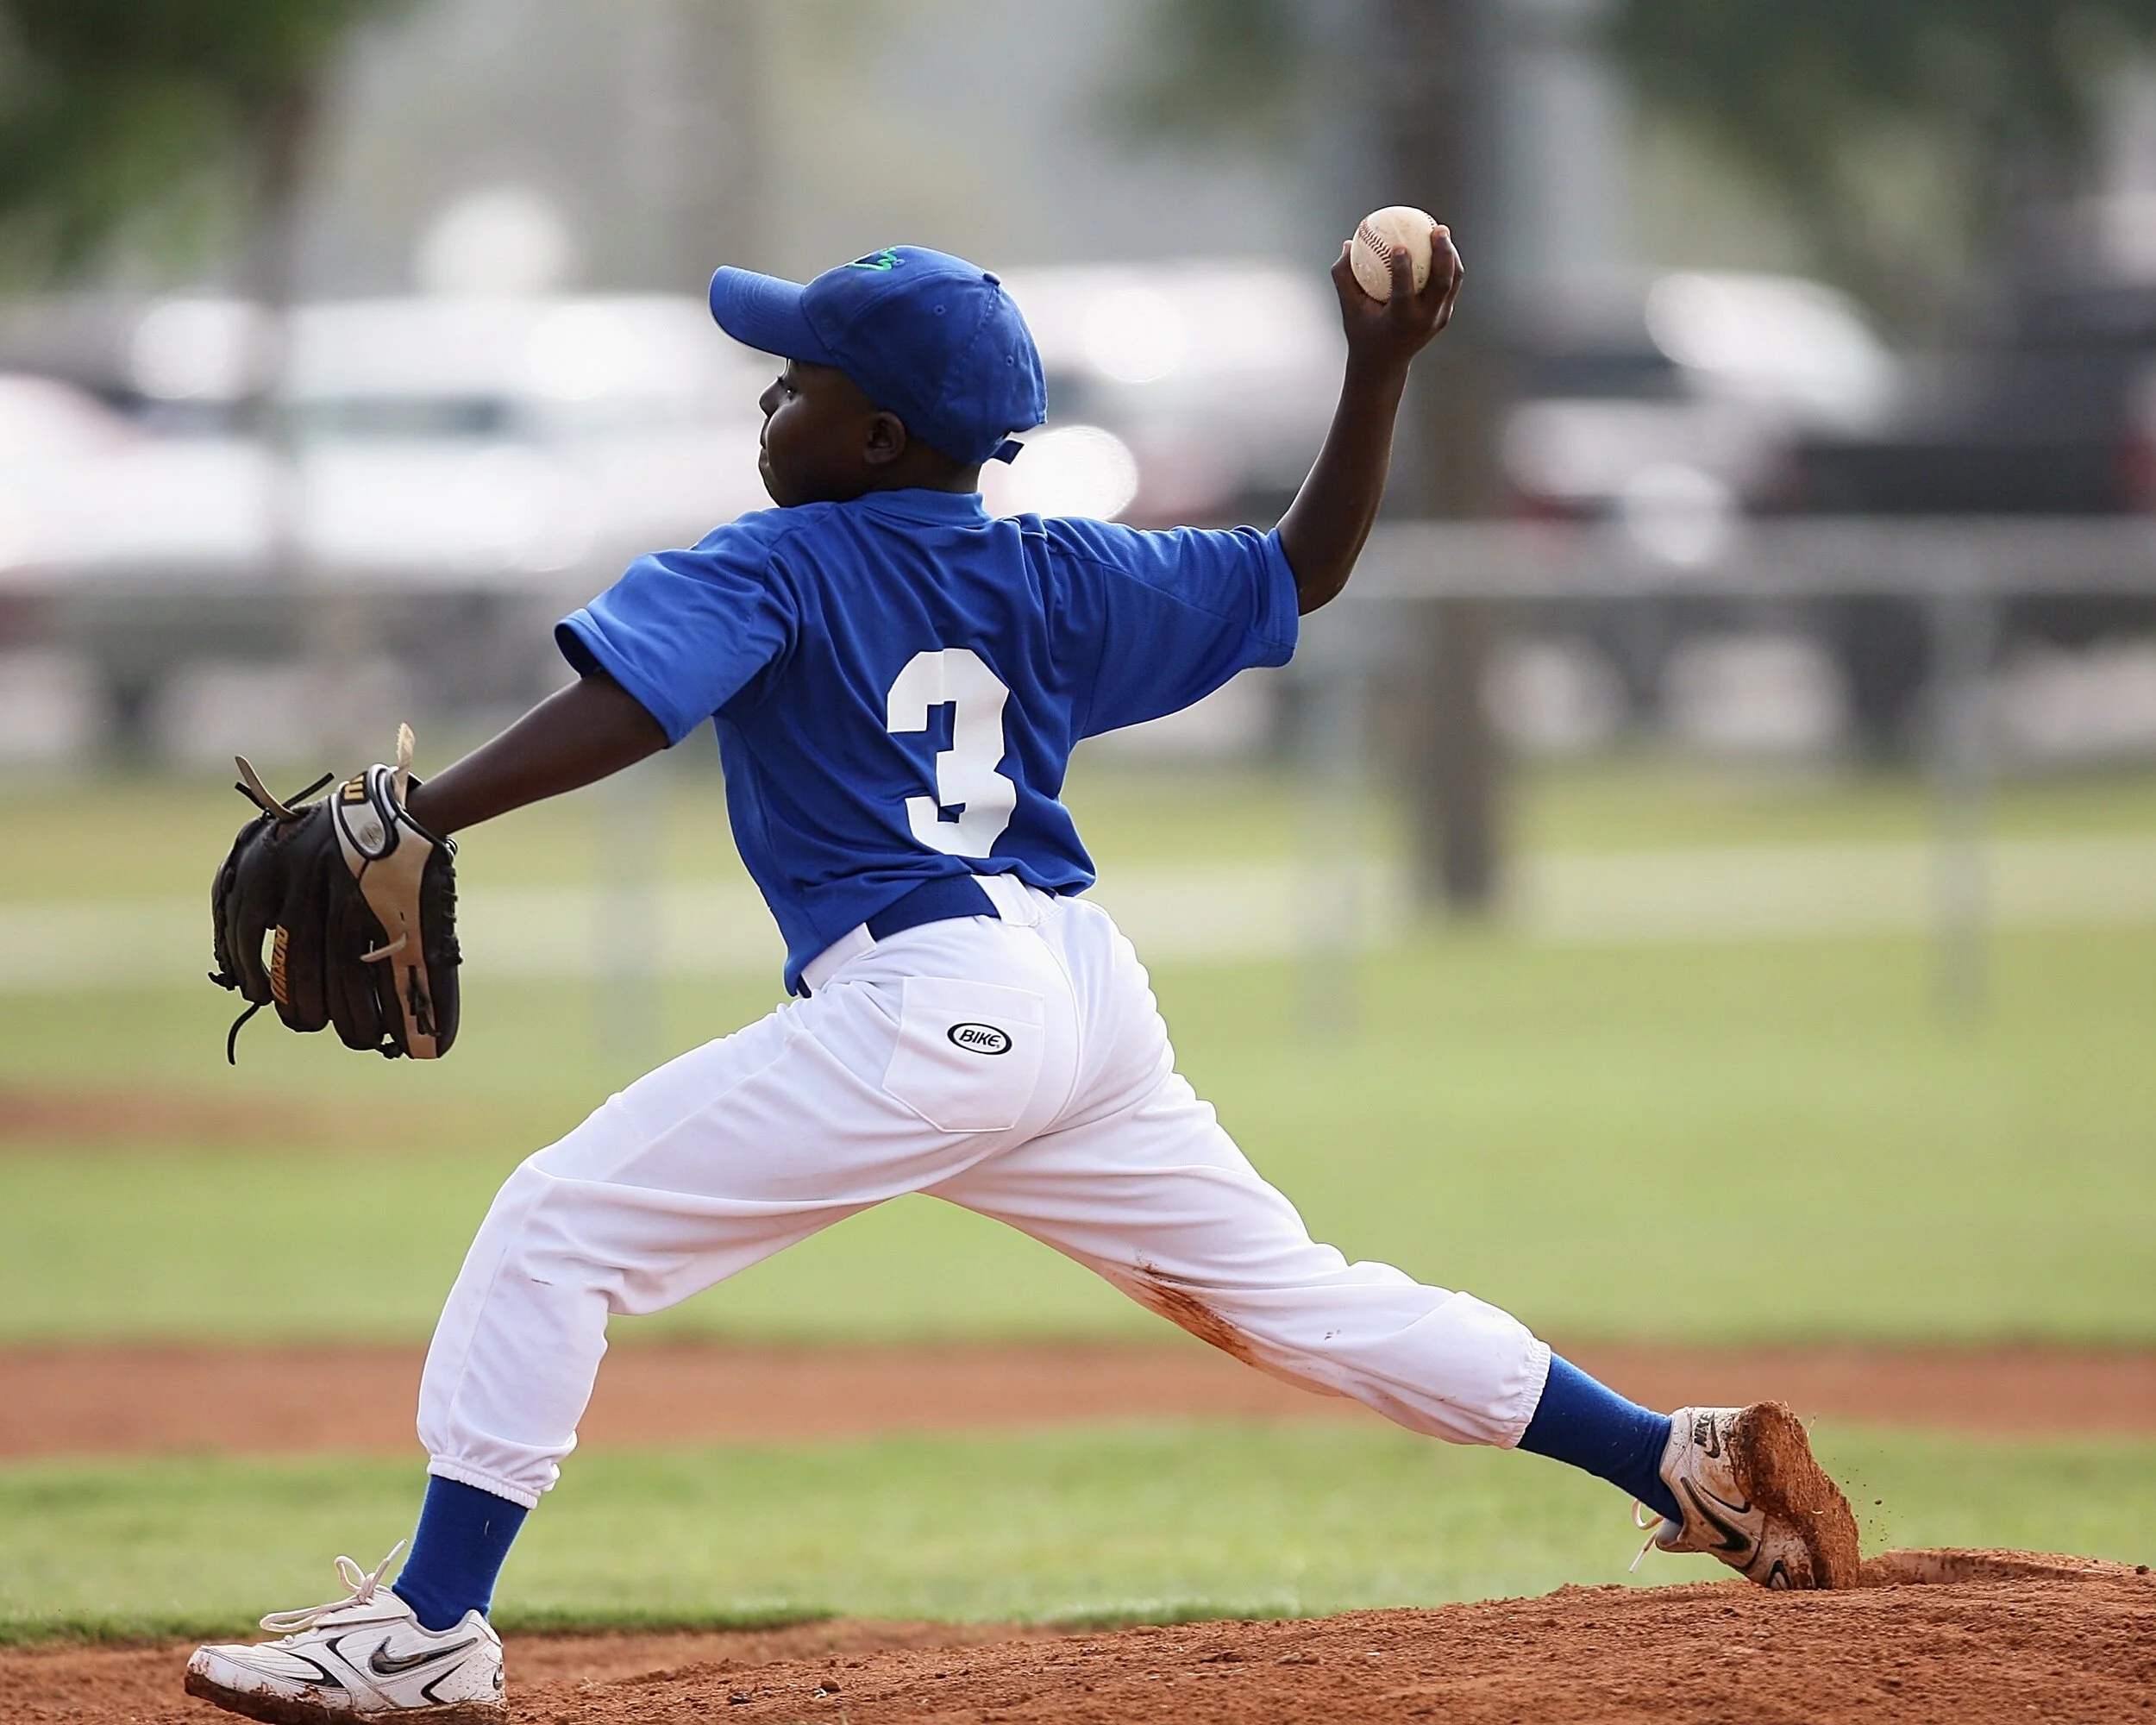
We parents love to support our children in their chosen activities and always seek to try to protect them from any potential harms that may come their way. If you have children who choose to play the repetitive throwing sports of baseball or softball, it is important and helpful to understand the potential risks to the health of their arms. It is also important that you realize that you can play a vital role in helping protect your child from injury.
As parents, we often put a lot of trust in the coaches of our kids. And, in many cases they deliver upon that trust, helping our children enhance their skills, learn the game, develop desirable characteristics that can carry over into life, and engage them in the goodness and growth that can come from being a part of a team. For this, we parents are grateful - thank you coaches.
A Potential Scenario
Sometimes amidst this goodness, coaches may inadvertently and indirectly contribute to the injury of your child’s throwing arm.
Have you or your child ever heard a coach say something like this, “Okay boys/girls it’s the first practice of the new season. Show me what you got.” In other words, the coach is encouraging the players to throw as hard as they can to see where they are at or what they may have lost over the winter. The coach may be interested in a starting point from which to build for each athlete. The problem is that these young arms, just like older mature arms, require proper conditioning/training before the stresses and strains of throwing hard are placed upon them. This can be especially important for young arms whose tissues are more pliable and prone to injury.
The arm’s soft tissues - muscles, tendons, ligaments, and joint capsule must be gradually strengthened to withstand the more intense stresses of forceful throwing without becoming injured. The main muscles that produce the force to propel the ball in the throwing motion are called “agonists”, the involved or working muscles.
Other muscles, known as “stabilizers”, must also be strengthened for them to efficiently perform their unique stabilizing function required in athletic performance, and certainly in throwing.
Further, the training of these muscles (both agonists and stabilizers) and other soft tissues should occur in the correct sequence to ensure an optimal conditioning effect and to reduce the risk for injury.
Start with Training the Shoulder Girdle Stabilizers
The motion of throwing incorporates multiple muscle groups involving the lower extremities (especially the powerful hip muscles), the core (abdominals), and the entire upper extremity, creating power and torque toward throwing the ball with velocity. The topic of this article will be solely focused on the upper extremity and specifically the shoulder and shoulder girdle muscles.
The shoulder girdle stabilizing muscles, those muscles that attach/insert onto the scapula and clavicle (collectively the shoulder girdle) play the very important role of stabilizing the shoulder girdle. This is necessary so that the arm muscles that produce the throwing motion, many of which originate from the scapula and clavicle, have a firm base from which to pull against in generating the force for the throwing movement. When properly stabilized, all the force of the arm muscles involved in throwing goes toward producing the desired movement.
If the shoulder girdle is not properly stabilized during the throwing motion, force generation will be lost due to excessive scapular movement, coordination may be compromised, AND with these abnormal biomechanics, potentially harmful forces are directed to the shoulder joint rotator cuff muscles (supraspinatus, infraspinatus, subscapularis, and teres minor). This can lead to repetitive use shoulder injuries such as tendinitis, impingement, bursitis, and possibly even tendon degeneration or tearing.
The shoulder girdle stabilizing muscles can be grouped into four main movement pattern muscle groups - scapular protractors, retractors, elevators, and depressors. In training these muscle groups for the purpose of their role as stabilizers, the resisted movements should incorporate the principle of isolation, focusing the resistance to their primary actions.

Scapular Elevators
(upper trapezius, levator scapula)
Commonly known as “shrugs”. While simply holding dumbbells in your hands, lift your scapula upwards.

Scapular Depressors
(lower trapezius, pectoralis minor)
With arms straight and holding on to parallel bars (or stationary objects of support such as chairs), press downward which will lift your body (weight) upwards.
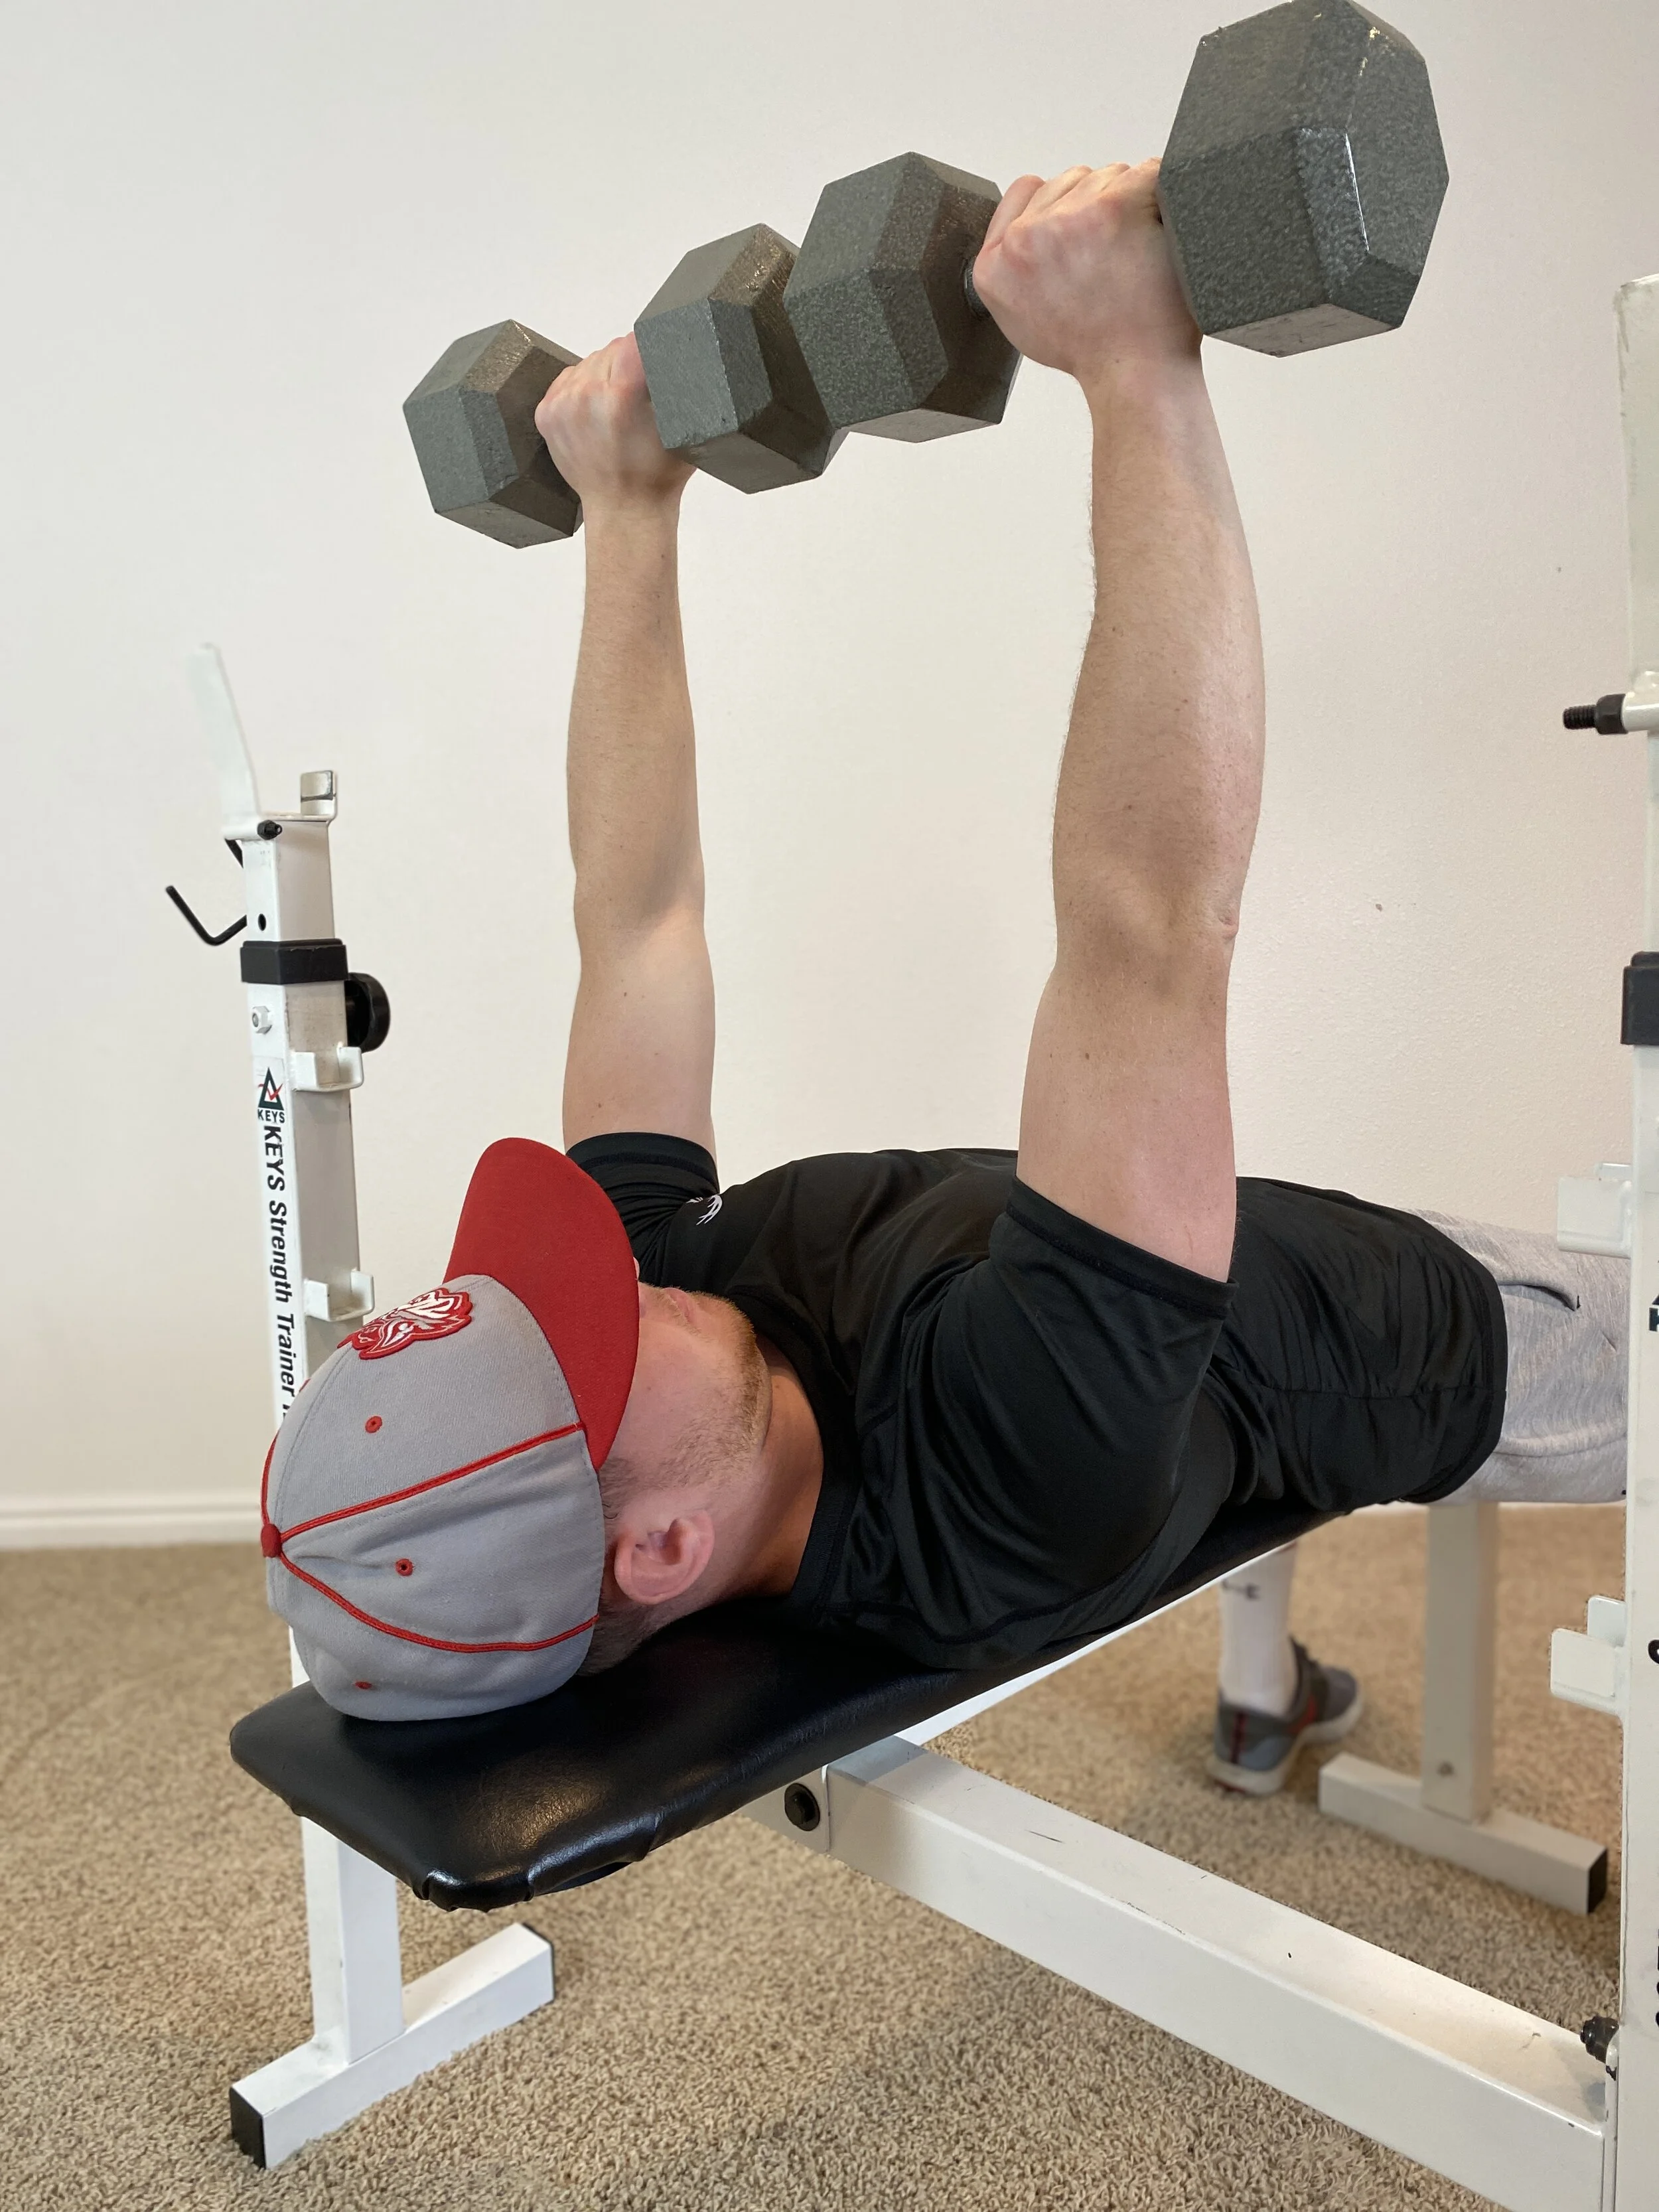
Scapular Protractors
(serratus anterior, pectoralis minor)
Lying supine (face up) on a table, bench, or floor, and with arms extended upwards and holding dumbbells, push upwards keeping arms straight.
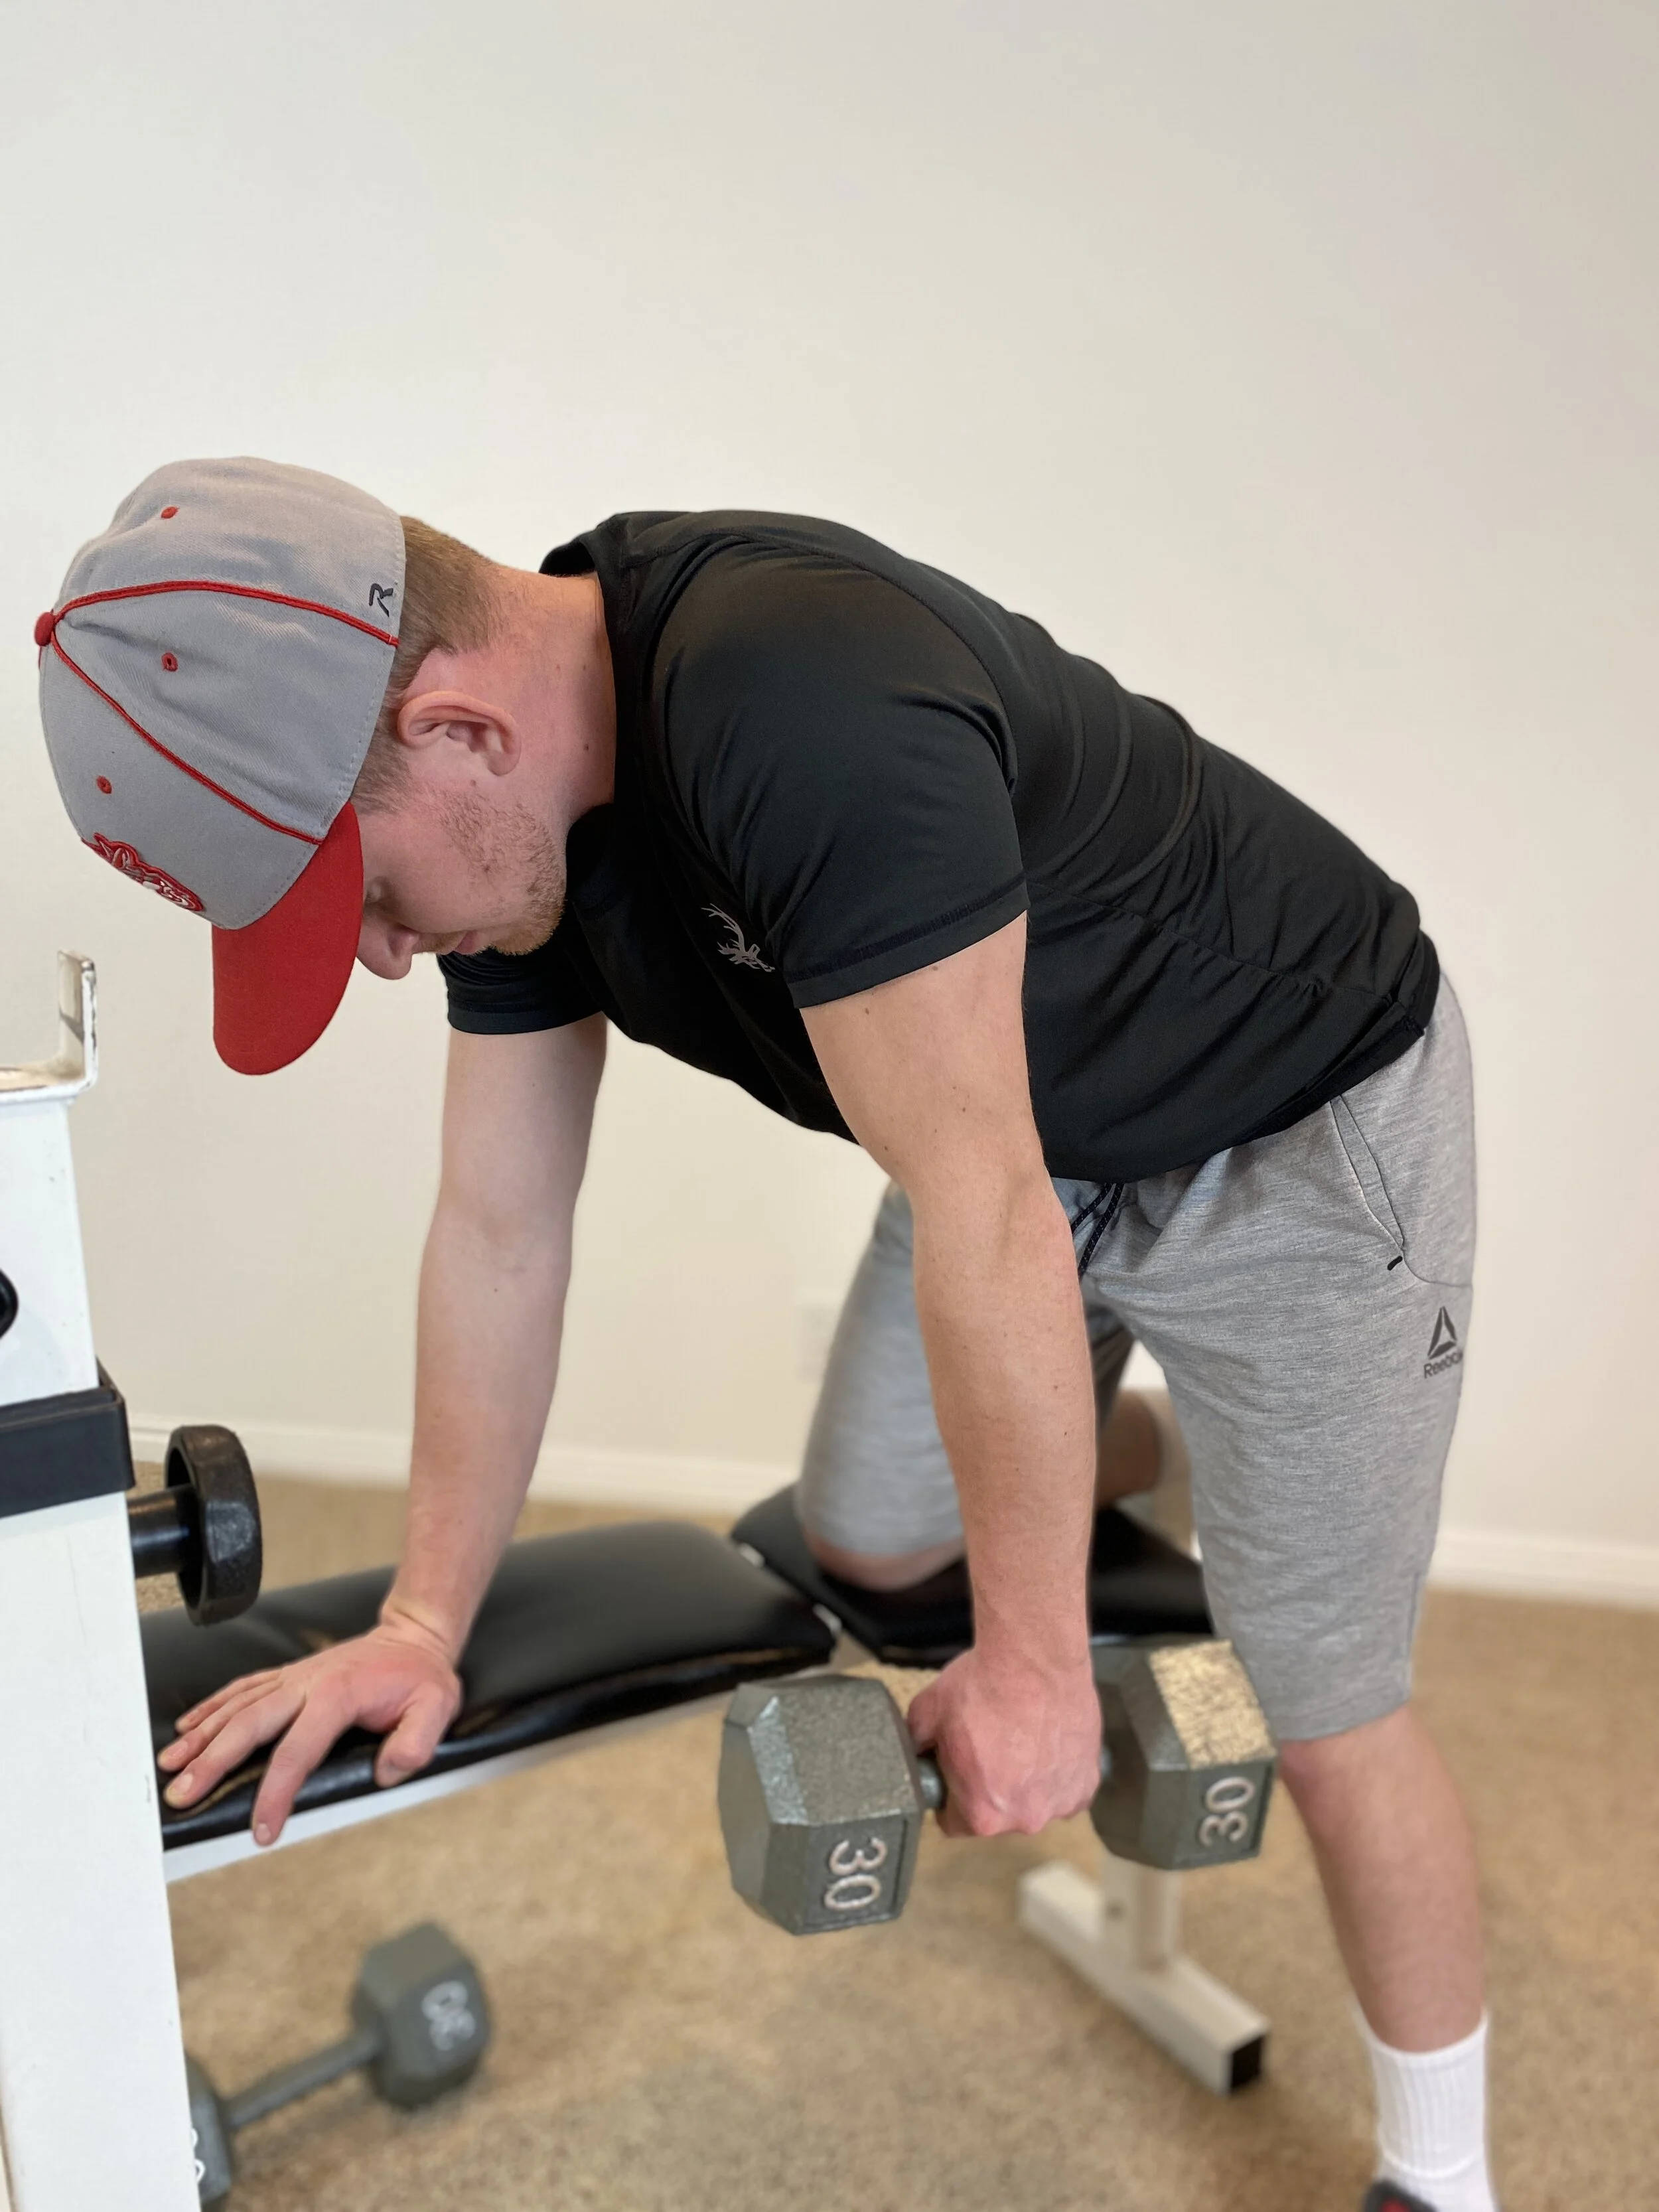
Scapular Retractors
(middle trapezius, rhomboids)
With the opposite leg placed on a bench and the opposite arm also on the bench used to brace the upper body and support the back, perform retraction by pulling your scapula toward your spine, lifting the dumbbell upward while keeping your arm straight.
Perform three sets of 10 reps for each exercise with a resistance weight that makes the last reps of the third set difficult to achieve as the muscles fatigue.
Next Train the Rotator Cuff Muscles
With the conditioning of the shoulder girdle stabilizing muscles underway it is time to begin strengthening the shoulder joint rotator cuff muscles (supraspinatus, infraspinatus, teres minor, subscapuaris). The shoulder joint rotator cuff muscles are responsible for three important functions.
· Stabilize the head of the humerus in the glenoid fossa of the scapula. When you consider the distraction/separation stresses imparted at the shoulder joint caused by the act of throwing, and the fact that gravity is always working to distract the humeral head from the shoulder joint socket, these four muscles are always working and doing so under stressful conditions.
· Decelerate the rotary forces that are inherent in the throwing motion. Consider the overhead throwing or pitching motion and the intense rotational forces being imparted at the shoulder joint by the big powerful chest and shoulder muscles. Then consider the considerable stress placed on the rotator cuff muscles to slow down that rotation. If they are not properly conditioned to handle these stresses, the likelihood of injury increases significantly.
· Accelerate the rotational motion at the shoulder to begin the throwing motion. This is certainly the least stressful action of the three major functions of the rotator cuff muscles, but nonetheless an important responsibility.
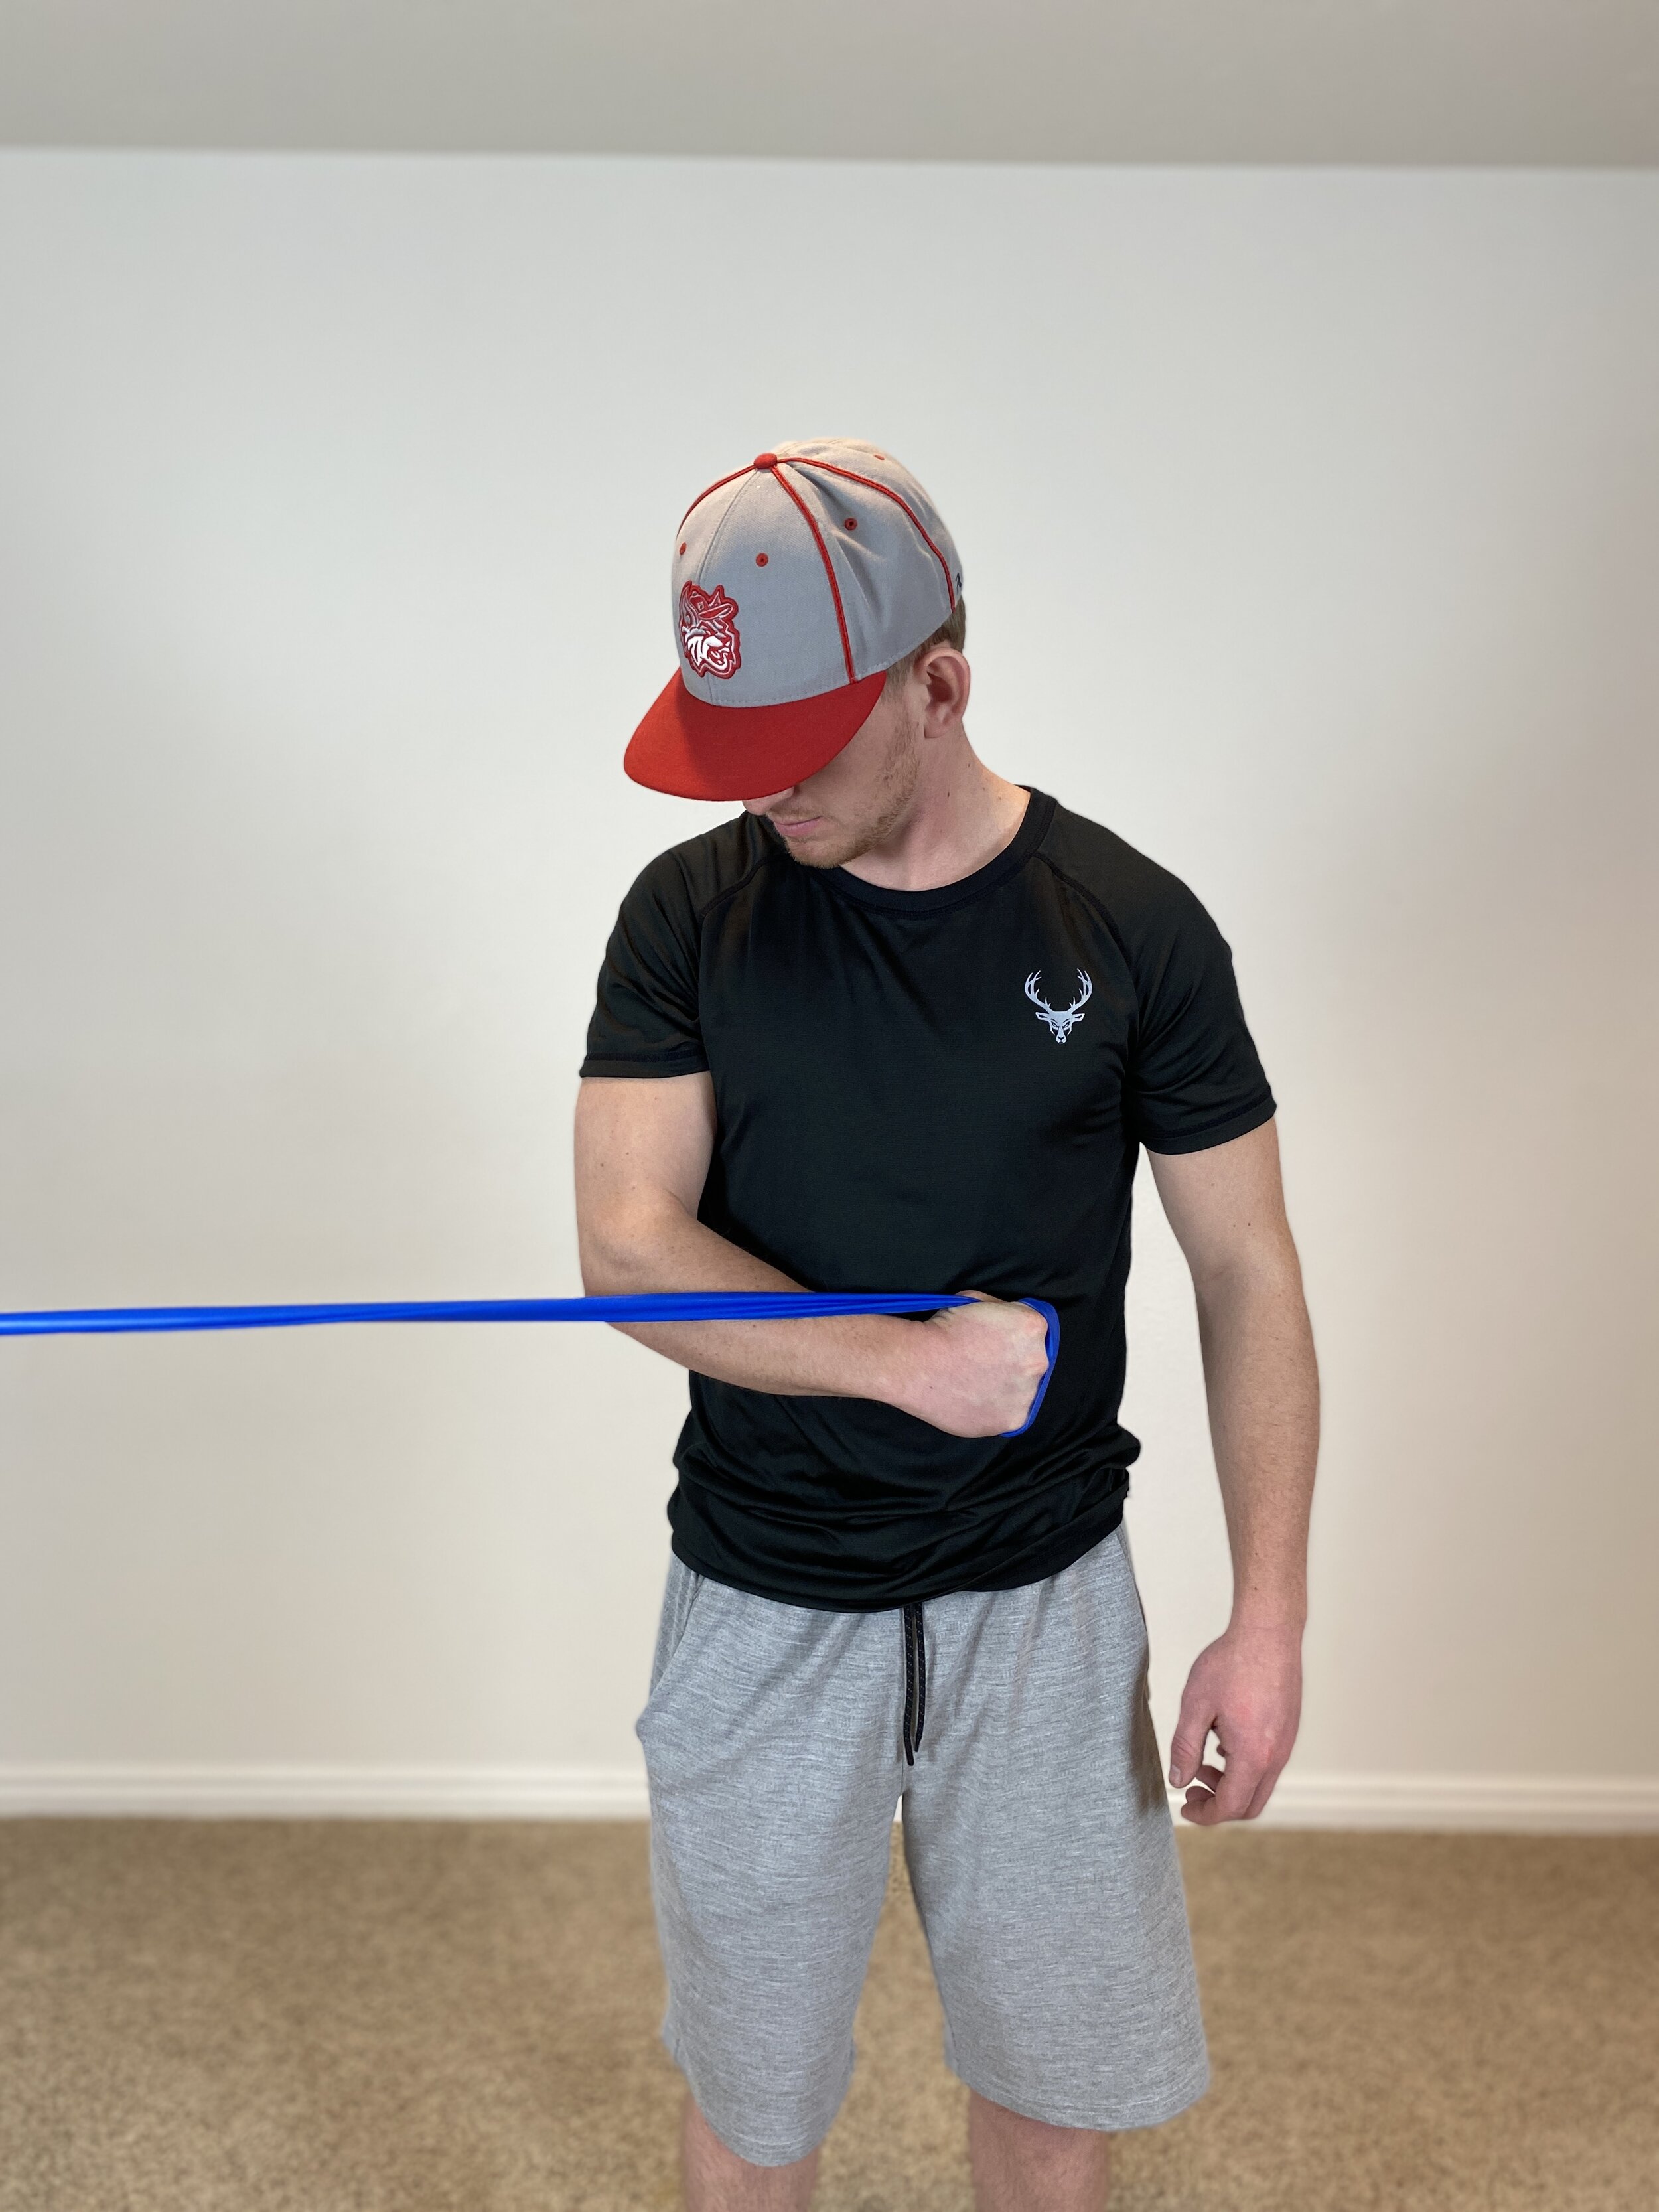
Subscapularis
With the upper arm kept next to your body and the elbow flexed 90 degrees, internally rotate your shoulder against the resistance of the exercise band.

Infraspinatus & Teres Minor
With the upper arm held next to your body and the elbow flexed 90 degrees, externally rotate your shoulder against the resistance of the exercise band.
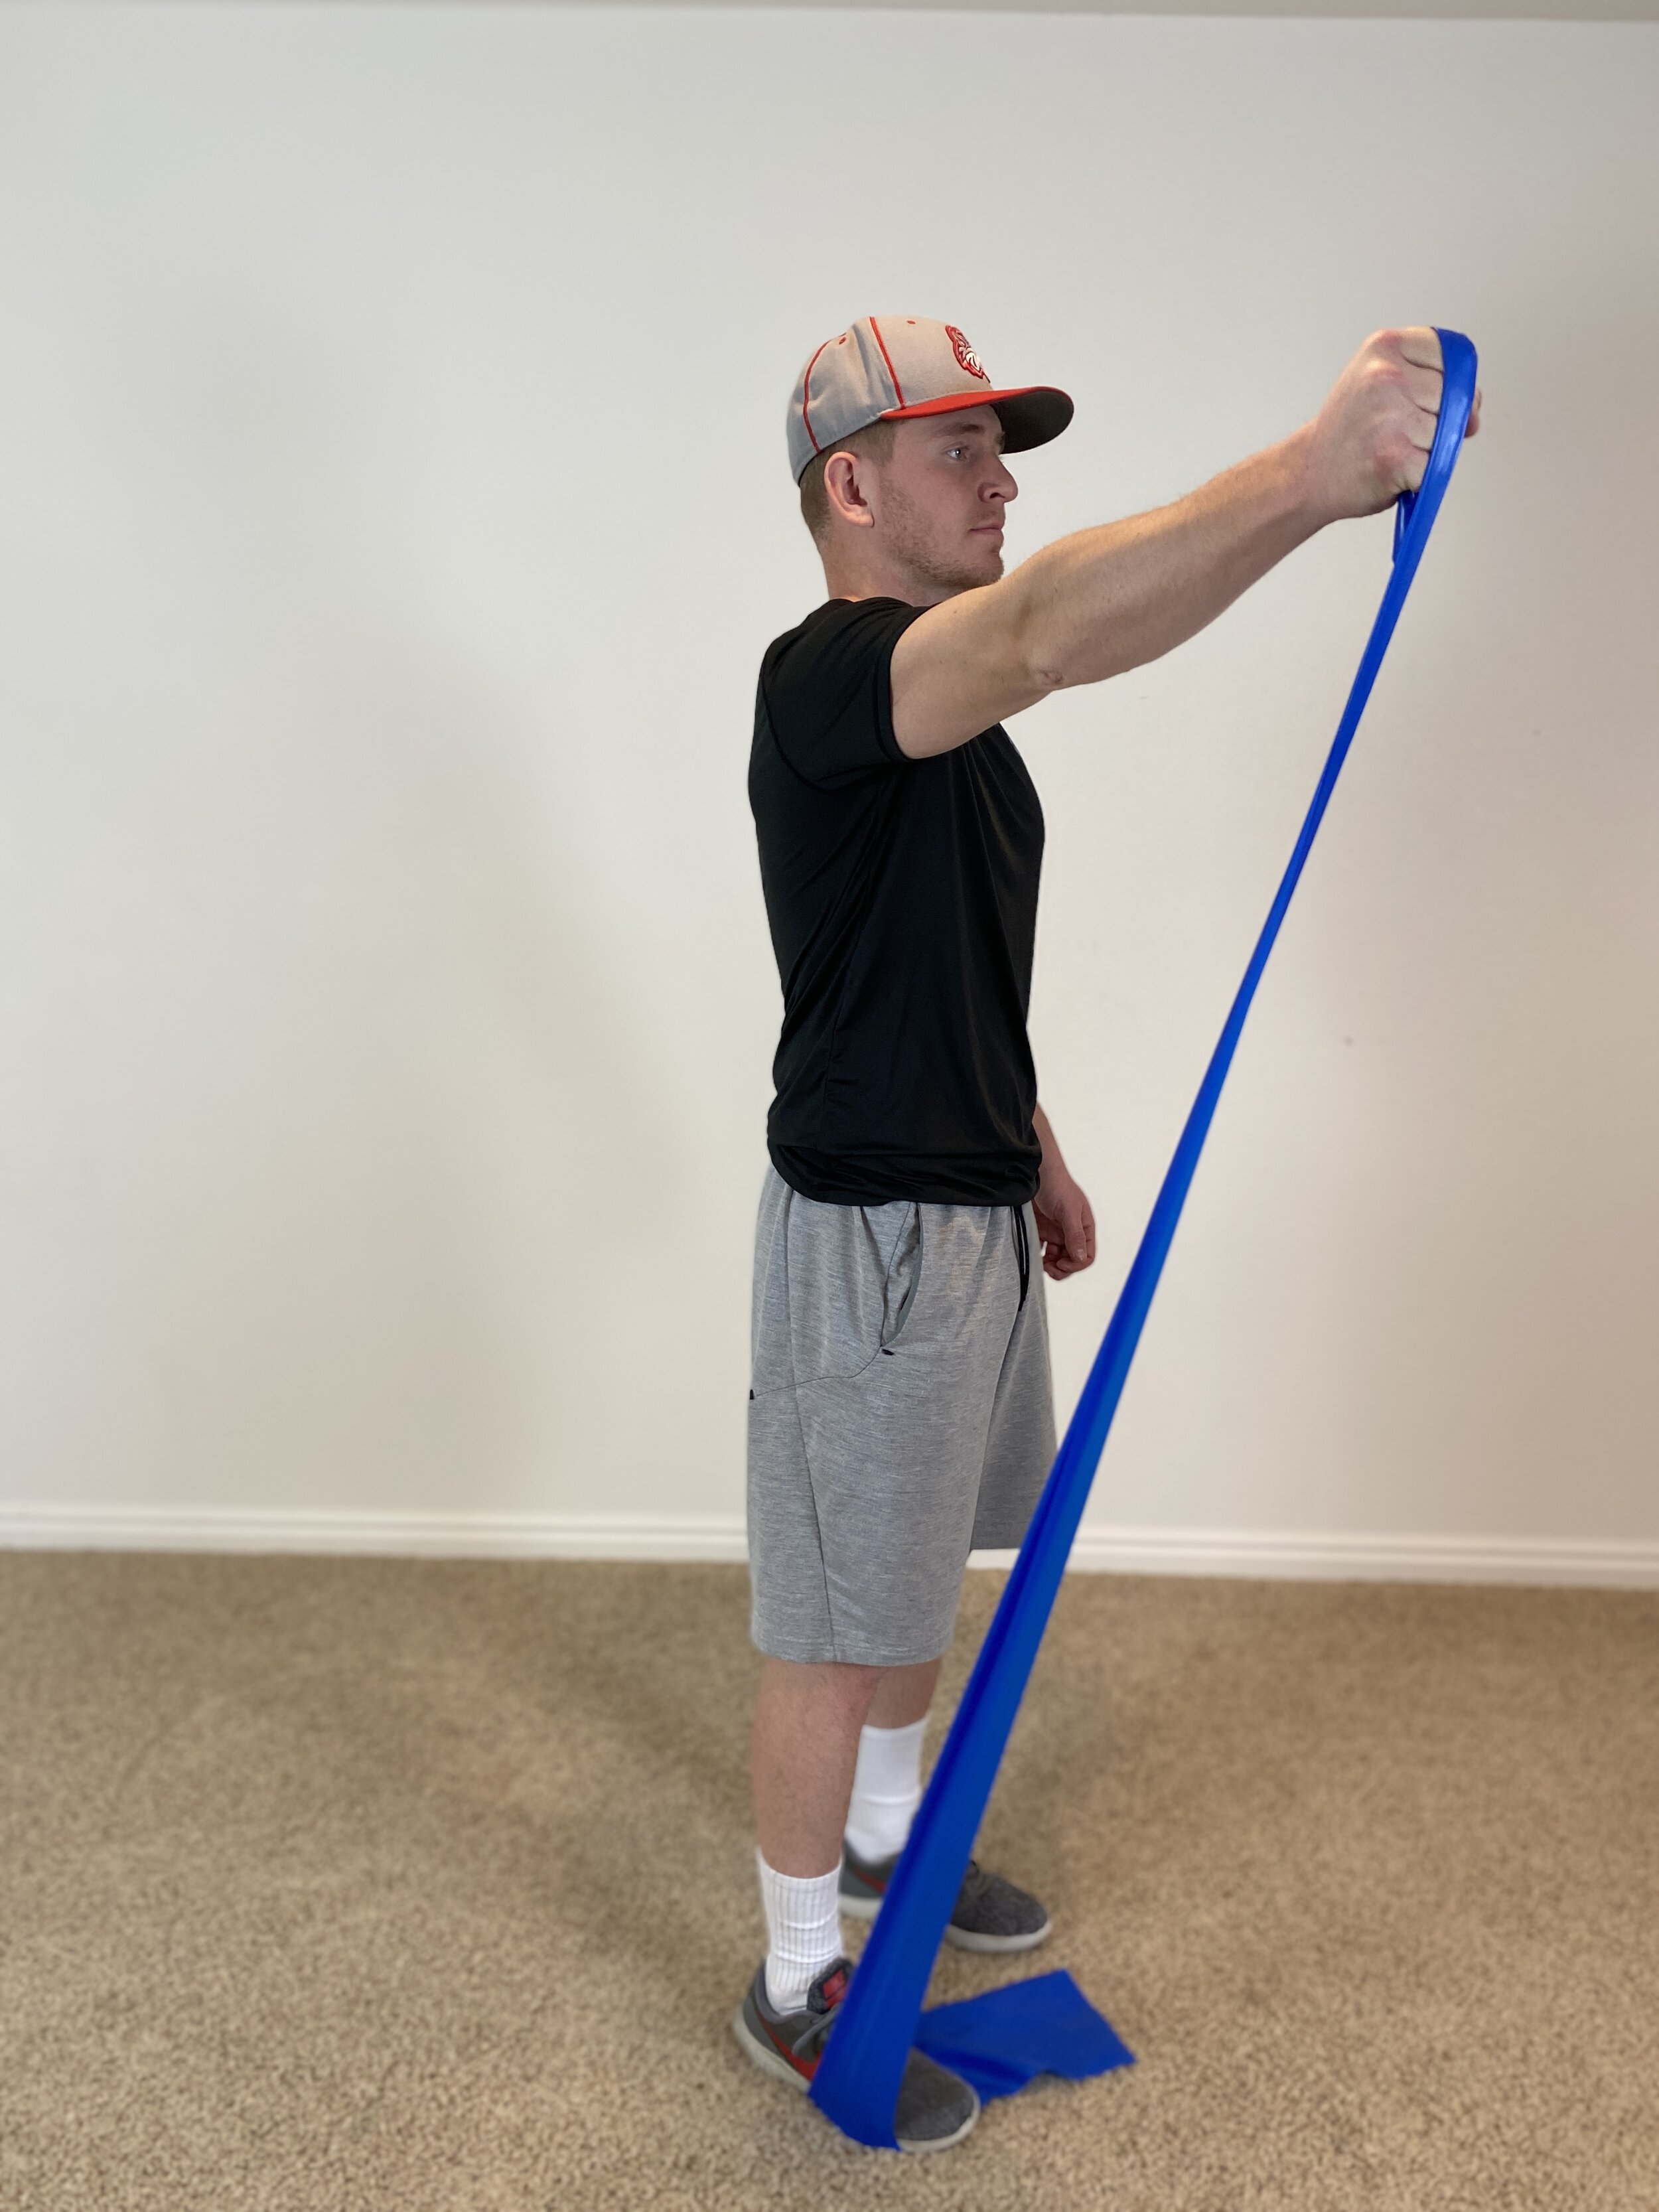
Supraspinatus
With the arm to the side and extended, abduct or raise the arm upward moving slightly forward as you raise the arm.
Ready to Begin Throwing
With the important scapular stabilizing muscles and shoulder joint rotator cuff muscles in good condition, your athlete is now prepared to engage in the rigors of throwing. However, as with any conditioning regimen, throwing should also be advanced progressively according to accepted standards.
Maintain Resistance Training and Range of Motion Throughout the Season
The ever-present principle of reversibility (aka, if you don’t use it, you lose it) requires that a conditioning stimulus be continually applied to help maintain the strength and integrity of the tissues and their protection against injury. The use of resistance exercise bands to accomplish this training stimulus is an effective approach during the season.
Note: While individual who served as model for this article is obviously older than the younger Little League players that should also train their muscles, the principles also apply to the beginning baseball player through and up through the ranks.
Success to you in helping your child properly condition his or her arm for the upcoming baseball or softball season and enjoying the sport together.
About The Author
Lynn Perkes is a full-time faculty member at Brigham Young University-Idaho teaching courses in Kinesiology and Biomechanics, Applied Kinesiology and Assessment, Therapeutic Exercise, and other Physical Therapist Assistant classes. He writes part-time for ProhealthcareProducts.com, who sells healthcare, therapy, fitness, medical, and personal protective equipment.